As a user belonging to a valid workgroup, you can add data (records) to a database in a number of ways:

Add New Record
Data can be added one record at a time. When creating a record you can set record access (i.e. assign ownership and set visibility) and then specify the Shared information for the record (i.e. the fields that comprise the description of your research object), which becomes available to other workgroup members.
In addition, (see Advanced Mode below), you can add private (Bookmarked) information, workgroup tags, and private or shared notes.
To create a new record
- From the Home Screen, click Add Record:

- In the Add Record dialog, select the type of record you wish to create:
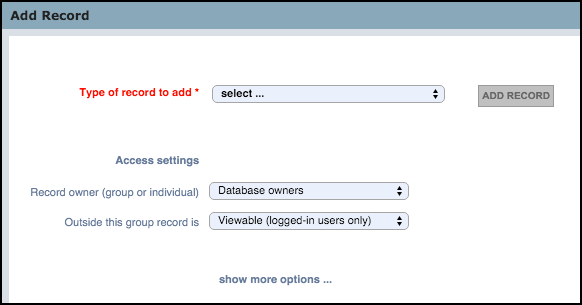
- To specify the record owner and visibility, select the Show Access Settings checkbox, and complete as follows (see Record Ownership/Access):
- Record Owner. Select the group you wish to restrict edit access to. By default, edit access is available to all members of the Owners Group. Workgroup members can edit and enhance the records collectively added to their database. You can set ownership to any workgroup. For personal databases or to restrict access to just yourself, select your name.
- Outside this Group. Select the visibility for this record for users other than the selected group or individual. Options are Hidden, Viewable, Pending or Published.
- To set additional, advanced settings, click show more more...:
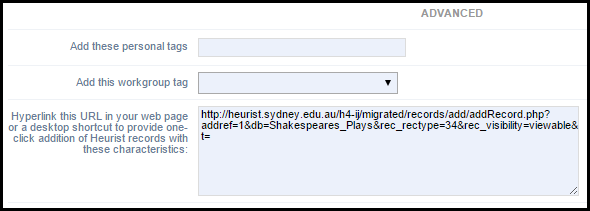
Complete the fields, as follows:
- Add these Personal Tags. This allows you to add personal tags to the record. Separate tags with comma. (See Tags.)
- Add these Workgroup Tags. Select an existing workgroup tag to be added to the record.
- Add Embedded Code. The hypertext box shows code that can be used to embed a link (URL) to a new record matching your current settings, in a web page, or as a shortcut on the desktop. This will have the same function as clicking the Add Record button with your current settings. Note that the hyperlink details change as your settings on this dialog change. You can use this convenient feature to save time when creating multiple records with the same settings.
Note. Your settings are retained by default for all subsequent new record creations (until reset).
- When complete, click Add Record. The Record Edit screen (Shared Information Page) displays:
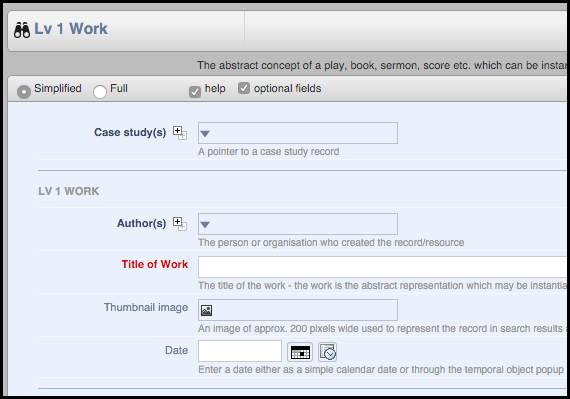
By default, the record opens in a Simplified view (showing data fields only and temporally hiding all extraneous information). Select the Full radio button if you wish to see additional tabs (see Advanced Mode below):
- Complete this screen as required.
The Shared Information page shows the editable content (fields) for a particular record. The type of information available on this page depends on the underlying record structure (as defined by the Database Designer). This information is available to other members of the database workgroup (but not to other database users outside of the workgroup). To modify a record a user must have permission to view and to edit the record.
Note the following:
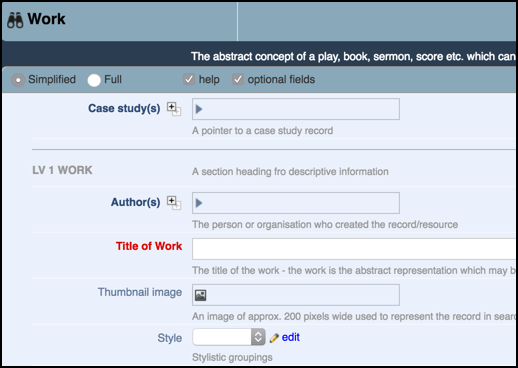
Field headings are colour-coded to indicate whether they are:
- Required. Mandatory fields (always shown, highlighted in red)
- Recommended. Recommended but non-mandatory fields (always shown, black)
- Optional. Optional fields (may be shown, Grey).
The double-plus sign  next to the field name indicates repeatability (i.e. more than one value can be created, with sometimes a top-limit defined). Click on the icon to insert any additional values.
Completion of any field will depend on the underlying data type. (See Data Types.)
Set the check-boxes as follows:
- Help. Deselect this check-box to hide any help attached to the fields.
- Optional fields. Deselect this check-box to hide all optional fields.
- When complete, click Save.
 A red diskette marker on a tab shows that information in that tab has been edited. You cannot leave the screen until this information has been saved (or intentionally discarded).
To edit the record, click on the record's Edit icon, from the Search Results pane:
Note. If you are not an owner of this record the edit option will be disabled. You can still view the edit dialog but the background will have a 'Non-editable' watermark.
To view the record in a separate window, click the View icon:
Advanced (Full) Mode
Selecting the Full radio button, provides additional tabs and options:
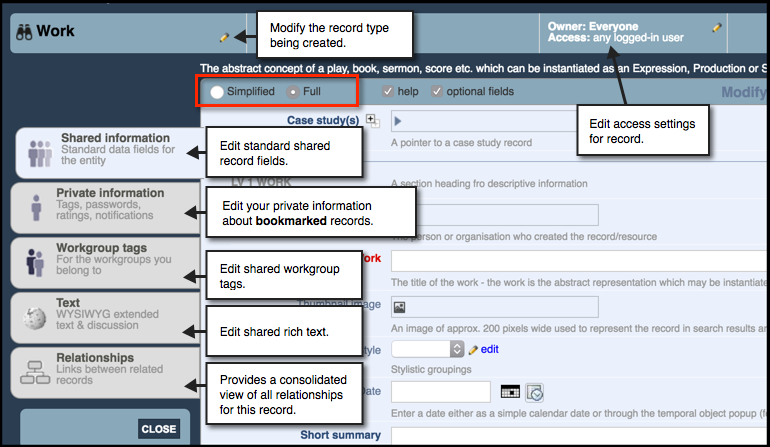
The additional tabs allow you to attach private and shareable (with your workgroups) information to the record.
Tabs are:
- Private Information. The Private Information page shows your (editable) personal information about the record. The tab content is available within 'bookmarked records only (i.e. restricted to the owner of the record and anyone who has bookmarked the record). (See Bookmark Records.)
- Workgroup Tags. The Workgroup Tags page allows a workgroup administrator (only) to select tags to add to the record. Selected tags appear in the Keywords area of a record and are only visible to the members of the workgroup. This allows workgroup members to refer easily and quickly to records using vocabulary that is familiar and meaningful to the group (e.g. as a group of researchers working collaboratively). (See Share Data | Set Workgroup Tags.)
- Text. The Text tab allows you to add extended notes to your record and engage in a discussion with other workgroup members. (See Share Data | Add Shared Text.)
- Relationships. The Relationships page shows a consolidated view of all of this record's relationships (i.e. links between this record and other records, regardless of type). This includes relationships added when completing a relationship marker field in a record. Relationships can be added, deleted and edited within the Relationships tab (although it is best practice to add relationships through the use of a relationship marker field). (See Manage Relationships.)
To edit access settings, see Set Record Access.
Created with the Personal Edition of HelpNDoc: Free Web Help generator