In order to use Heurist on a particular server, you need to register once as a new Heurist user and then create a new (default) database or open an existing database that you have access to. You can then create and manage databases as you require.
Registration involves supplying your user details and a password. You need to register just once. Registration will be approved by the owner of the Heurist installation (the 'System Owner') on your particular server.
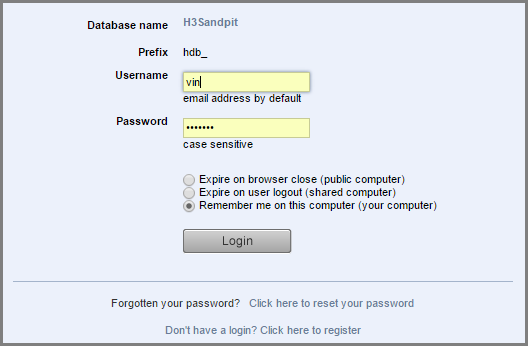
Once your registration has been approved you can then use your registration details to log in to the first, default, database you create. From this database you can then create new databases, and change your log-on details if required.
To register for a Heurist account on a particular server
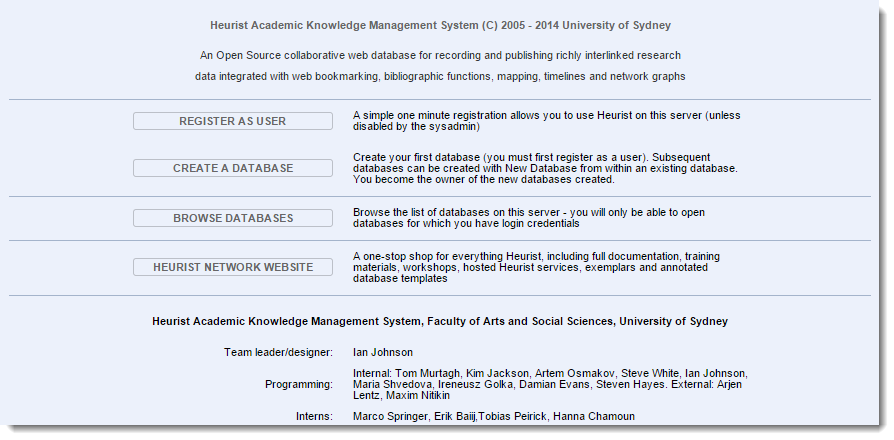
The Heurist Project Page is the starting point for your Heurist activities and is normally installed in the root web directory. For example, on the Heurist server at the University of Sydney it is accessible at the following URL:
http://heurist.sydney.edu.au/
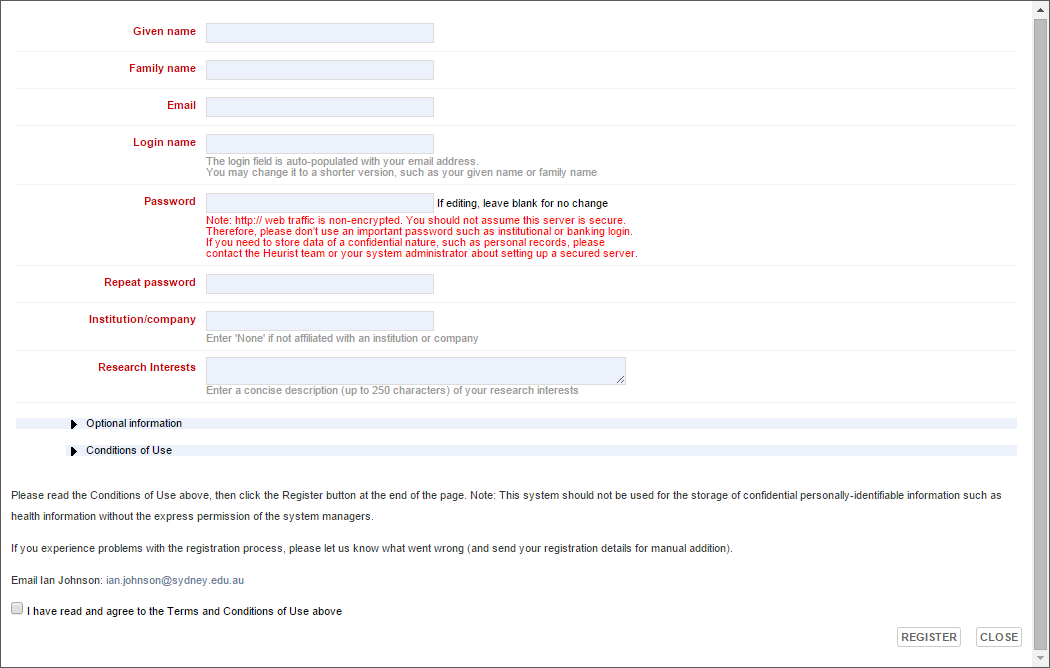
Important. If the URL of this page starts with http:// your details are not sent over an encrypted connection so do not enter any private information here (such as using your bank password etc.). If you require greater security, please consult with your system administrator to discuss security and https:
Once your registration is approved (by the System Owner) you will receive a confirmation email from the owner. This will show your login details and provide a link back to the Project Page.
Note. You should receive a registration confirmation email from the System Owner within anywhere from a few minutes to a few hours, depending on time zone differences and the efficiency of the System Owner − if the delay is longer you may consider emailing the System Owner directly.
You can use the Create a Database option on the Project Page in order to create your first database (after registration). Subsequent databases can be created from within Heurist itself.
About the default database:
When you use the Create a Database option to create your first database, you are creating a 'default' database. The primary purpose of this database is to give you an entry point to the Heurist Home Screen from where you can then create new databases or open existing databases. You are the owner for this database and can use it to get to know Heurist and explore its features (you can create and delete records etc.).
Note. You should not use the default database as a project database. To start using Heurist properly you need to create a new database (see Create a New Database) or open another database (see Open a Database).
To create your first database:
You can use the Browse Databases option on the Project Page if you have not created a database of your own and wish to open an existing database that you have been given permission to access (including publicly available databases).
Note. Subsequently you can use the Open Database option from within any database to open a database.
See Open an Existing Database.
Created with the Personal Edition of HelpNDoc: Easy EBook and documentation generator