Owners and administrators can manage workgroups and workgroup members (users).
Note. The person creating a workgroup becomes an Administrator of that workgroup and cannot be removed from it.
As an Administrator, you can create and delete workgroup, add users to any workgroup, and manage workgroup tags. You can also temporarily remove yourself, as Administrator or user, from any workgroup.
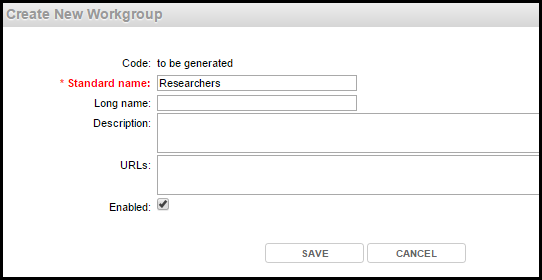
To add a new workgroup
Note. Select the My Groups checkbox to show only groups that you are a member of.
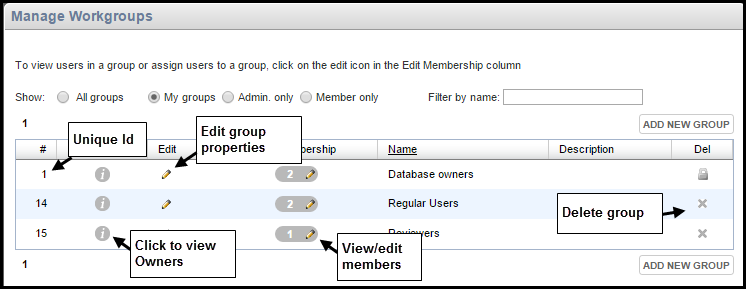
The number of members in any group is shown under the Edit Membership column.
To edit the workgroup, click on the Edit icon. To edit membership, click the Edit Membership icon (see Add/Remove Group Members).
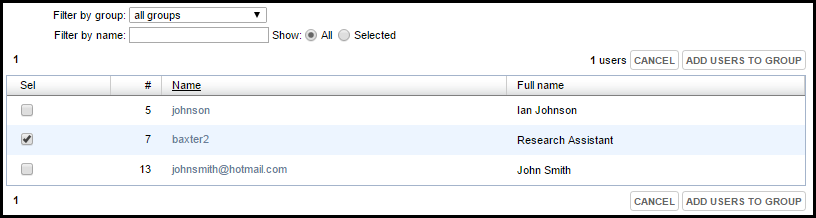
To add users to a group
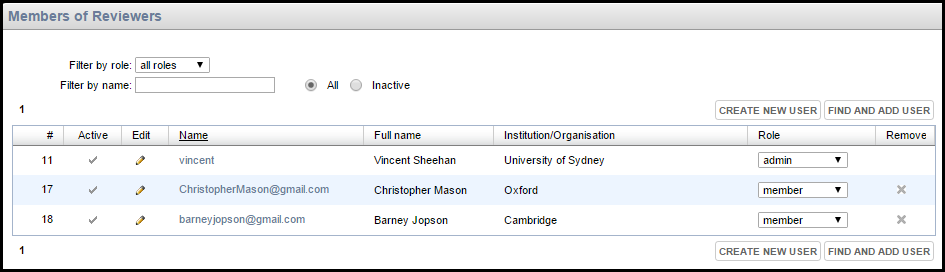
If a user does not exist, you can create them by clicking Create New User (see To Create & Manage Users.)
Note. To remove the member (this does not delete the actual user), click the Delete icon for the user.
To add workgroup tags
You can add tags to any workgroup of which you are an administrator. These tags then become available to members of the group. (See Share Information.)
Note. Unlike personal tags, which can be freely added by individual users while editing data and apply only to that user, workgroup tags are a controlled list of shared tags established by a workgroup administrator. They provide a form of 'social bookmarking'.
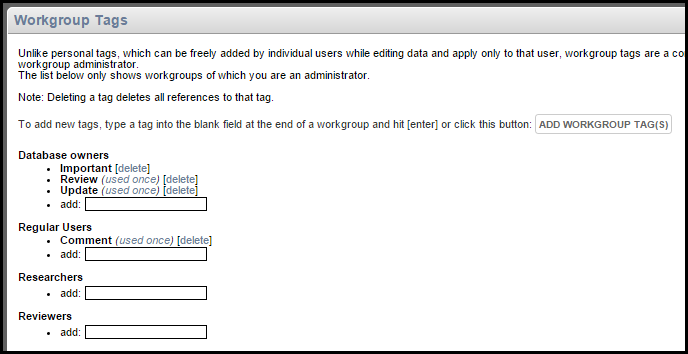
Tags are shown underneath each workgroup, along with their usage (i.e. the number of times they have been used to tag a record).
Note: Deleting a tag deletes all references to that tag.
To quit a workgroup temporally
This option allows you to exit a group, or relinquish administrator status for a group (other than groups you have created), for the rest of your session.
You might wish to do this to be able to view a database from the perspective of non-administrator end-users or non-users to check what information is available to them.
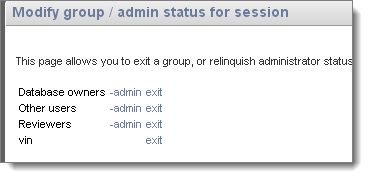
These changes are temporary and are not saved to the database.
Created with the Personal Edition of HelpNDoc: Free Kindle producer